Thursday, February 23, 2012

Soft Snickerdoodles


If there's one thing I hate, it's hard snickerdoodles. I've never been a fan of the cookie. I've never understood people's obsession with them. All the snickerdoodles I've ever had are like trying to eat a brick, and I don't enjoy eating desserts when I'm in fear of chipping a tooth. So, I've just avoided the cookie altogether. After I made the blondies for Jaime's co-workers, one of the them suggested snickerdoodles and of course my eyes instantly glazed over. Are you kidding me? The one cookie I hate. But hey, this gave me an opportunity to turn a brick into a glorious soft spongy edible cookie. And I pulled it off. I made a soft snickerdoodle that...wait for it...stayed soft longer then 10 minutes! Even a day later they're still soft and enjoyable.

There are few ingredients that go into snickerdoodles. These simple yet daunting cookies consist of butter, vanilla, white sugar, eggs, baking soda, salt, flour, cinnamon, and cream of tartar. Start by preheating your oven to 350 degrees F and sticking at least two cookies tray into the freezer to chill.

Dry ingredients
Start by whisking flour, cream of tartar, baking soda, and salt together in a medium bowl. Set the bowl aside for later.

Next, put softened butter and white sugar together in a large bowl.

Butter and sugar combination
Mix together until the butter and sugar are fully combined and the mixture is smooth. This may take a few minutes so be patient.

After the butter and sugar have been mixed together and the mixture is smooth, add the eggs, one at a time. Mix until the egg is totally incorporated. After the eggs have been added mix in the vanilla until everything is fully combined. The batter should creamy and wet.

Seperate the dry ingredients into three different sections so that it's not all added at once. Add the sections one at a time and mix until the dry ingredients disappear into the batter completely. After the batter is totally combined put the bowl of batter into the freezer and chill for 10-15 minutes. This will make it easier to roll.

While the dough is chilling in the freezer combine the white sugar and cinnamon into small bowl and whisk until fully combined. This will be used to roll the dough balls in.

Once the dough is chilled take it out along with one cookie sheet. It's time to start pumping out these cookies!

Roll the dough into about a one inch ball. My first tray of cookies were a little small but with trial and error you'll find the perfect size.

Take the dough ball and roll it around in the sugar cinnamon mix until fully coated.

Repeat the above step until your cookie sheet is filled. I had to pat the dough balls down some so they cooked wider. While your cookies are going into the oven put the dough back into the freezer so that it stays chilled.

Put the cookie sheet into the oven at 350 degrees F and bake for 9 minutes. Remove from the oven and remove them from the cookie sheet immediately. Put the cookie sheet just used back into the freezer and pull out the other cookie sheet and fill that one with dough balls like before. Repeat this until your dough runs out.


Now you should have some soft snickdoodles to enjoy!

Soft Snickerdoodle Recipe
1 cup of butter (2 sticks)
1 1/2 cups white sugar
2 large eggs
2 3/4 cups all-purpose flour
2 teaspoons cream of tartar
1 teaspoon baking soda
1/4 teaspoon salt
1 teaspoon vanilla

Cinnamon Sugar Coating
3 tablespoons white sugar
3 teaspoons cinnamon

Saturday, February 18, 2012

Nuttin' but Chewy Blondies


This is a recipe I've tried once before. We "hosted" a Super Bowl party this year for the Giants v. Patriots game and I graciously made dips to partake in, lil' smokies to snack on, and this delicious blondie recipe to top it all off. I wanted a good, easy, and sweet snack to make, but I didn't want to make anything usual and expected. So I made a blondie. It's like a brownie, only better. It consists of the general ingredients like flour, sugar, baking soda and powder, vanilla, butter, and eggs. But what makes a blondie so special is the brown sugar, walnuts, chocolate chips, butterscotch, and coconut. They're easy to make and absolutely delicious! Jaime told some guys at work about these heavenly little treats and of course they wanted some. So I made a double batch for him to take to work. Enjoy boys!

I made a double recipe but I'm going to give you guys just the normal recipe. Start off by preheating the oven to 325 degrees F. Grease a 9X13 inch pan with butter or spray butter. Now onto preparing the batter!

Start off by mixing the dry ingredients together in a medium sized bowl. This would be mixing the flour, salt, baking soda, and baking powder together.

Next, cream room temperature butter in a large bowl until creamy.

Beat in the white sugar and brown sugar until smooth. This will take about 2-3 minutes.

Add the eggs one at time. Mixing for a minute each after each egg is added. The batter should go from extremely thick to more of a liquid.

After the eggs are added and well incorporated, mix in the vanilla.

Add the dry ingredients in sections.
Section 2 of the dry ingredients being mixed into the liquid batter.
Separate the dry ingredients into three sections, so that it isn't added all at once into the liquid batter. Mix each section of the dry ingredients into the liquid batter on low until it all disappears into the batter.

The batter will become thick and almost dough-like once all the dry ingredients are added.

Once the batter is all mixed, add the semi-sweet chocolate chips and butterscotch chips.

Once the chocolate chips and butterscotch chips are mixed into the batter, add the walnuts and coconut and mix until well incorporated.

The batter will be extremely thick now and overflowing with chocolate, butterscotch, walnuts, and coconut.

Next, spread the batter into a buttered pan and try to spread as evenly as you can.

Put the pan into the oven at 325 degrees F and bake for 40 minutes. Test to see if it's fully cooked by inserting a toothpick or knife into the center of the pan. It should come out clean.

When fully baked, take out of the oven and let them cool completely. This may take a while. The blondies should be a beautiful light brown color. The edges may be a little higher then the center also.

When completely cool it's time to cut them and enjoy your hard work!

Nuttin' but Chewy Blondie Recipe
2 cups all-purpose flour
3/4 teaspoon baking powder
1/2 teaspoon baking soda
1/2 teaspoon salt
2 sticks (8 tablespoons) of butter
1 1/2 cup brown sugar
1/2 cup white sugar
2 large eggs
1 teaspoon vanilla
1 cup semi-sweet chocolate chips
1 cup butterscotch chips
1 cup chopped walnuts
1 cup sweetened shredded coconut

Adapted from: browneyedbaker


Wednesday, February 15, 2012

Chocolate and Peanut Butter Cupcakes

The almighty of all flavors! I bet most of you instantly think of the combination I'm about to talk about. And yes, I'm talking chocolate and peanut butter. I honestly don't think I've ever met anyone who didn't like chocolate and peanut butter. I mean it's the perfect combination. It's heaven mixed with rainbows, and any other awesome combination of things you can think of. Yesterday was Valentine's Day and I decided on a whim to make my wonderful boyfriend a wonderful dessert to eat after dinner. Normally I'd make a romantic dessert like some type of yummy custard, cheesecake, or anything more fancy then a cupcake, buuuut Jaime is impartial to cheesecake and wary of things he's never tried before. And I wanted him to be excited about dessert. So I decided to make chocolate peanut butter cupcakes. He loves chocolate and peanut butter (Reese's is his favorite candy) and he enjoys my cupcakes. So it was perfect!

So I embarked on a quick journey onto the Internet and found a recipe to help me along. If I had more time and maybe thought it out before hand I would have came up with my own recipe, but I didn't. So the following chocolate cupcake recipe is from a website called browneyedbaker.com. I followed it mostly except I didn't make my cupcakes dark chocolate and I used less sour cream. The peanut butter butter cream frosting is adapted from a Martha Stewart recipe, and by adapted I mean I looked at it and then changed it to my liking.

This is a picture of the general ingredients used. There was all-purpose flour, white sugar, baking powder, baking soda, vanilla, semi-sweet chocolate, unsweetened cocoa powder, powdered sugar, eggs, creamy peanut butter, unsalted butter, sour cream, and Reese's hearts. To begin with preheat the oven to 325 degrees F and line the baking pans with cupcake tins.

Butter, chocolate, and cocoa powder
Next use a small microwave safe bowl and put the butter, semi-sweet chocolate, and cocoa powder into it. Then set it aside for later.

The dry ingredients which consisted of flour, baking soda, and baking powder. (Sorry for the gray bar, I don't know what happened)
Then in a medium bowl combine the dry ingredients which consist of flour, baking soda, and baking powder. Whisk so the dry ingredients are evenly dispersed throughout the mixture. Then set aside for later.

The liquid mixture which consisted of eggs, sugar, and vanilla.
In a large bowl beat the eggs until smooth. Then add the white sugar and continue to beat until the mixture is well incorporated. Finally add the vanilla and beat until fully combined into the liquid mixture.

Melted butter, semi-sweet chocolate, and cocoa powder
The next step is to take the chocolate ingredients that were set aside from earlier and melt them. Put them into the microwave and cook for 1 minute on 50% power. When the minute is up take the mixture out and stir for a while. If the chocolate isn't fully melted put it back into the microwave for another 30 seconds on 50% power. Take it out and stir until fully melted and well mixed.

Once the chocolate mixture is cooled and fully combined, pour it into the liquid mixture and beat it together until well incorporated.

The liquid mixture and first section of dry ingredients
Once the chocolate mixture and liquid ingredients are combined it's time to add the dry ingredients. Separate the dry ingredients into three sections so that it's not all dumped into the liquid mixture at once. Add the first section of dry ingredients and mix until fully incorporated.

The second section of dry ingredients and sour cream
When it's time to add the second sections of dry ingredients add the sour cream with it. Mix until fully incorporated and then add the third and final section of dry ingredients and mix.

The cupcake batter at it's finest
When everything is fully incorporated the batter should be thick. Now it's time to bake that gorgeous batter into some gorgeous cupcakes!

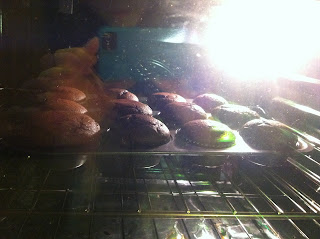
Fill the cupcake tins about 2/3 full. The one on the lower left corner was too full and ballooned into an awesome mushroom shape, but oh well.

Bake at 325 degrees F for 18-20 minutes. To test if they're done insert a toothpick into the middle of a cupcake. The toothpick should come out clean.

Once the cupcakes are done pull them out of the oven and let them cool in the pans for an additional five minutes. Once the five minutes is up take them out and let them cool completely. While they're cooling you can make the filling and frosting.

The filling for the cupcakes included creamy peanut butter, butter, and powdered sugar
The filling mixed
To make the filling you beat the creamy peanut butter, butter, and powered sugar together until fully incorporated. The filling will be thick and should ball easily.

To make the butter cream frosting you start by mixing the butter and creamy peanut butter until smooth. Then add the powered sugar 1/4 of a cup at a time until the frosting is smooth and holds shape.

The frosting should be a light brown color and thick. In this picture I have the frosting already in a piping bag.

Now that cupcakes are completely cooled it's time to hollow them out. Take a sharp knife and insert it on the outer edge of the cupcake. Cut out a cone shape so that the smallest point is towards the bottom of the cupcake. Once you have the cone out of the cupcake slice off the extra and save the top of the cupcake so you can cover up the filling.

Spoon enough peanut butter filling into the cone shaped hole you cut out in the cupcake to completely fill it.

Put the top that you saved back onto the cupcake to cover the peanut butter filling. Do this to all the cupcakes. Now it's time to decorate!!!

I swirled the peanut butter frosting onto the top...

...and topped it off with a Reese's heart to make it festive! The perfect Valentine's Day dessert for my Jaime <3


Chocolate Cupcake Recipe
1 stick (8 tablespoons) of butter, cut into 4 pieces so it melts easier
2 oz of semi-sweet chocolate
1/2 cup of unsweetened cocoa powder
3/4 cup all-purpose flour
1/2 teaspoon baking soda
3/4 teaspoon baking powder
2 large eggs
3/4 cup white sugar
1 teaspoon vanilla
1/2 sour cream

Peanut Butter Filling
1 cup creamy peanut butter
3 tablespoons butter
2/3 cup powdered sugar

Peanut Butter Butter Cream Frosting
2/3 cup creamy peanut butter
1 stick (8 tablespoons) of unsalted butter (note the unsalted butter part)
1 cup powered sugar

That sure is a delicious and cute looking cupcake!! Happy baking!